How to Delete Windows and Install Kali Linux
Kali Linux, by Offensive Security recently released its new version of penetration testing platform Kali Linux v2021.1 with some new features. Also, Microsoft released its most advanced final version of the Windows Operating System,Windows 10.
So how it will be when these two killer badass OSs come in the same device. In this article, we are going to guide you on how to dual boot Kali Linux v2021.1 with Microsoft Windows 10. Dual boot means running two separate OS in the same HDD.
If you are not a fan of Windows 10, then don't worry — with this tutorial you can also dual boot Kali Linux withWindows 7/8/8.1.
Before starting tutorial checkout —5 things to do before dual booting Linux with Windows
Materials Required:
Before starting this tutorial first checkout materials required :
- Of course a PC/Laptop .. lol
- 4GB Pendrive (Minimum)
- At least Dual-Core (either Intel or AMD) with minimum 1GB of RAM
- Windows 10 or any other version of Windows (already installed)
- Kali Linux (latest version) → Get It Now
- Rufus →Get It Now
- Some Patience
Video tutorial available at the end of the article.
So let's start:
Dual Boot Kali Linux v2021.1 With Windows 10:
Step 1:
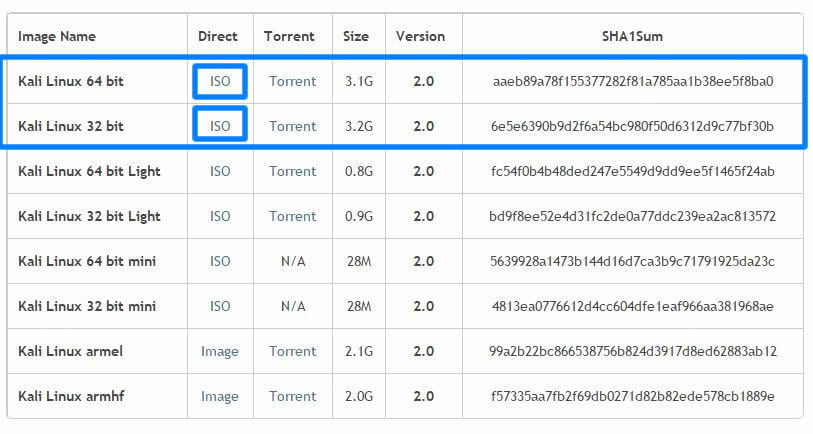
First, download Kali Linux latest version ISO file from the above-provided link. Download either 32 bit or 64 bit, that's your choice.
Step 2:
After downloading Kali Linux the next step is the creation of a bootable USB. For that, we need Rufus – a utility that helps to create bootable USB flash drives. So download it from the above link and install it.
Step 3:
Let's start making a bootable USB. First, connect your USB drive. As already said we need a minimum 4GB memory pen drive.
Now run Rufus and follow steps to create a bootable USB.
Step 4:
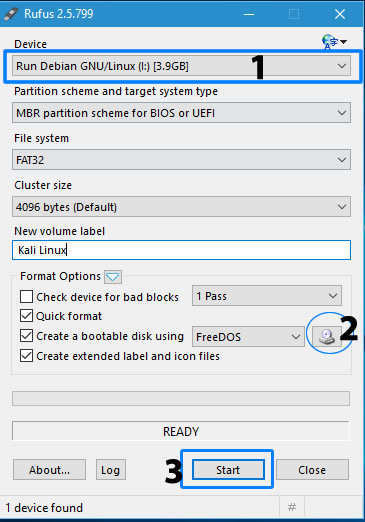
Now you get a screen like the below image.
Step 5:
First, check your USB drive is selected. Then click the small CD drive icon below (2) and locate the Kali Linux iso file that you downloaded from Kali official website. And finally, click " Start " and wait for the process to complete.
Step 6:
After process completion, click the close button to exit from the Rufus window and yes, here is your Kali Linux bootable USB drive.
Other than dual booting Kali Linux with Windows, you can also use this bootable USB to live boot Kali — means run Kali without installing it but with some limited features and functions.
Step 7:
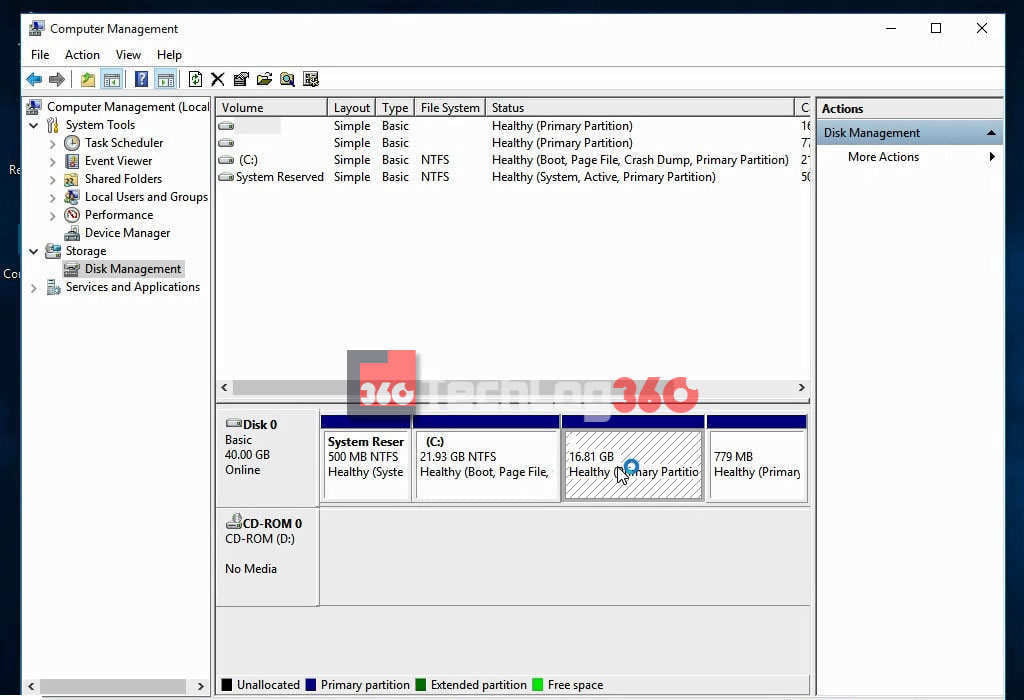
Next, we are going to create a separate partition for the Kali Linux installation. So open your Disk Management settings or Run " diskmgmt.msc " command in Windows.
Create a new partition of size about 15-20GB minimum by shrinking an existing volume. Here we created a new partition of size 17GB.
Step 8:
Initial processes are all done. Downloaded Kali Linux ISO, created a bootable USB drive and created a separate partition for Kali Linux installation.
Before going on keep in mind always Disable Secure Boot and Fast Boot option in BIOS.
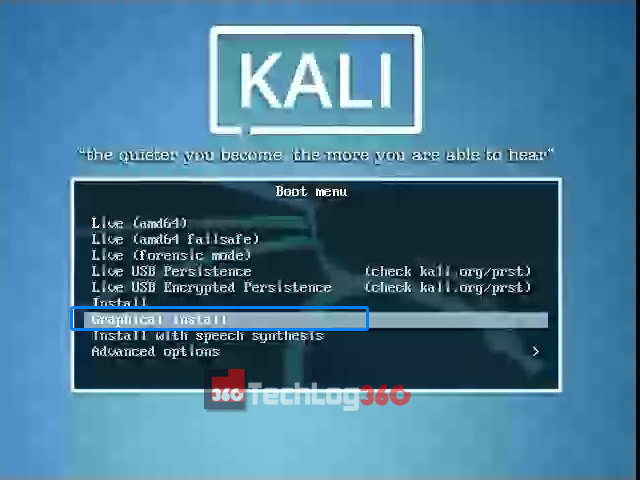
Now restart your PC/Laptop and go to boot manager and select the option boot as USB [Options will be different for different brands]. Now you will see the installation window of Kali Linux.
There are different options to install Kali Linux. Here you have to choose " Graphical Install " to start with ease.
Step 9:
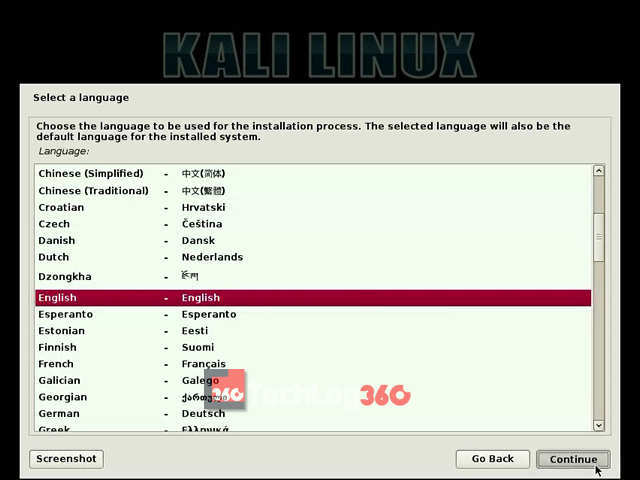
Choose the language to be used for the installation process. And press "Continue".
Step 10:
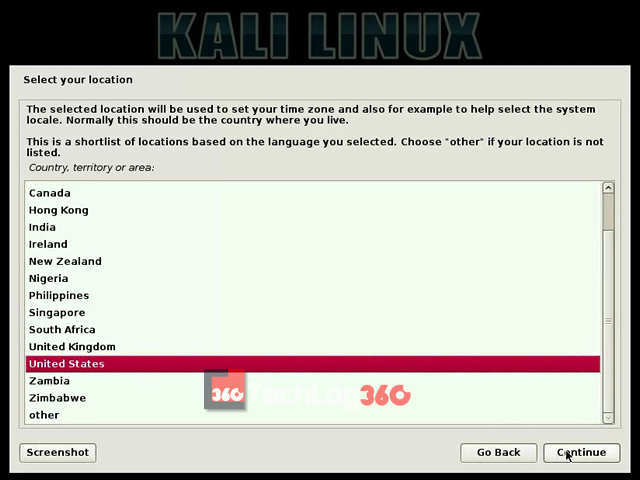
Choose your country and continue the installation process.
Step 11:
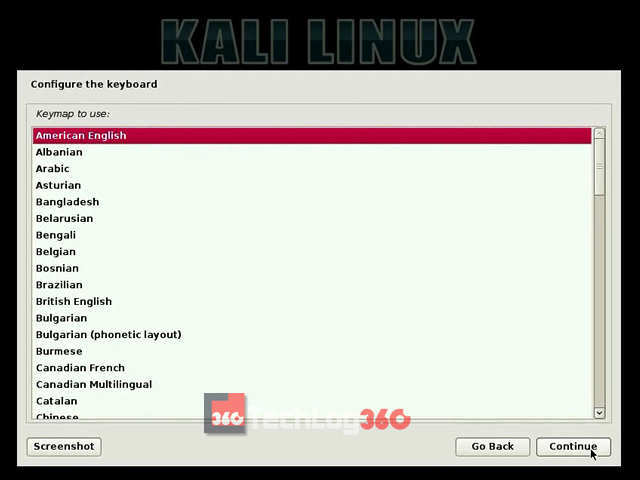
Next set type of keyboard layout. Here I choose "American English".
Step 12:
Next step set IP configurations. You can configure your network automatically or manually.
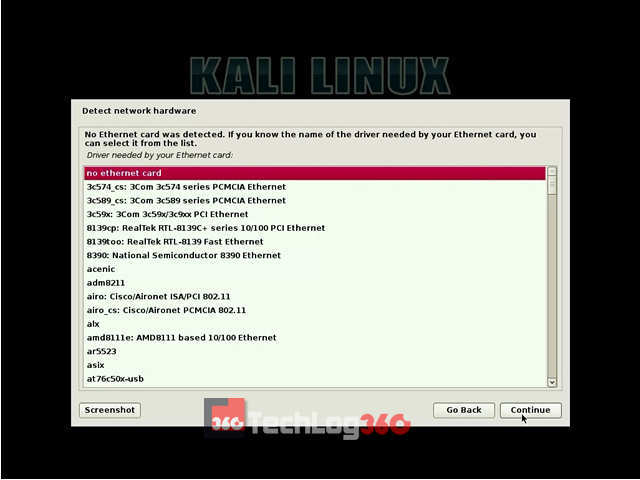
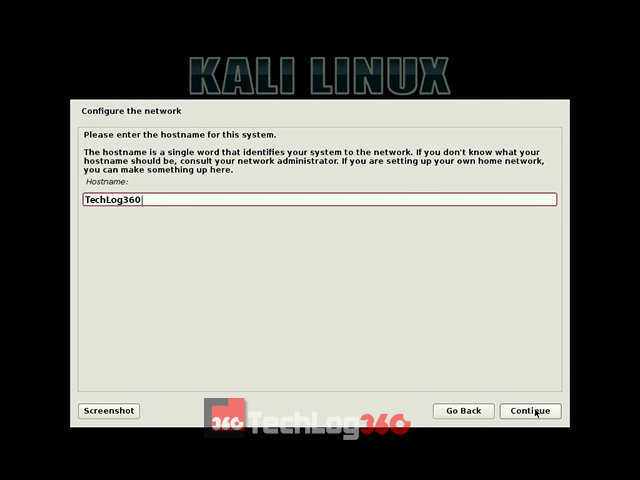
Step 13:
Now the installation will ask for a Hostname. Set any name you want. It's kinda like a username.
Also Read: The best Linux distro for beginners
Step 14:
In this step, you have to enter a password for "root user ". After entering the administrative account password click "Continue".
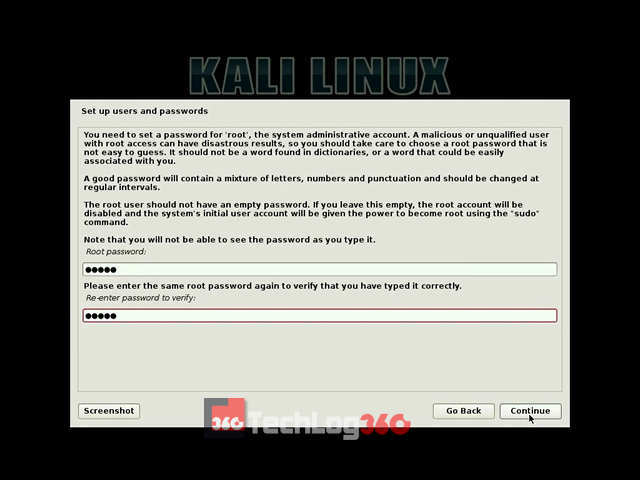
Step 15:
Next, choose the partitioning method as " Manual ".
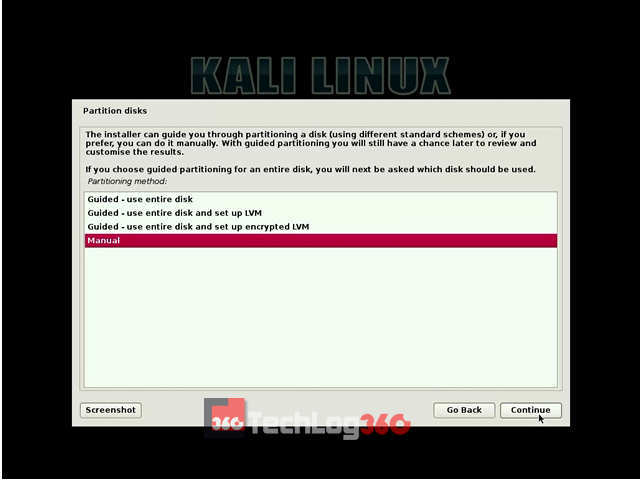
Step 16:
Carefully do this step. Only choose the partition that we created earlier for Kali installation and press "Continue".
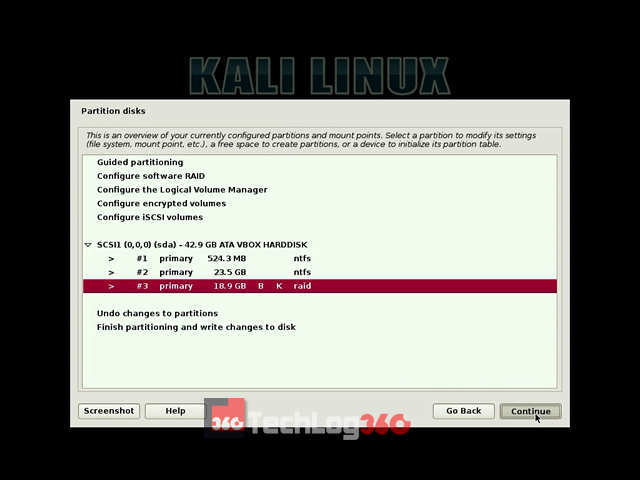
Step 17:
Then select the option " Delete the partition " and hit "Continue".
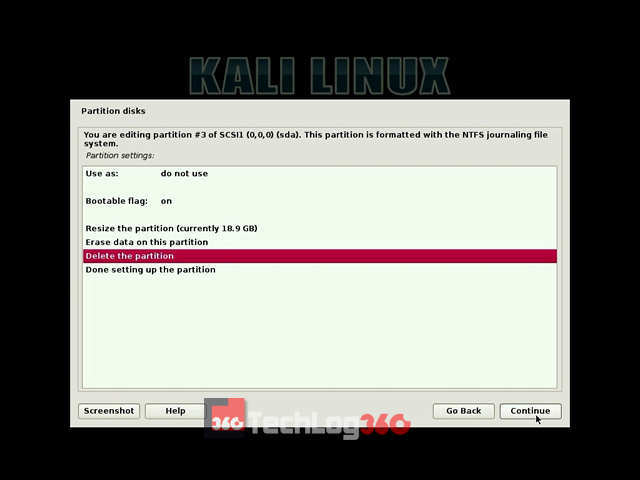
Step 18:
After the above step, now you can see that your Kali installation partition is now shown as " FREE SPACE ". Choose that free space partition and "Continue".
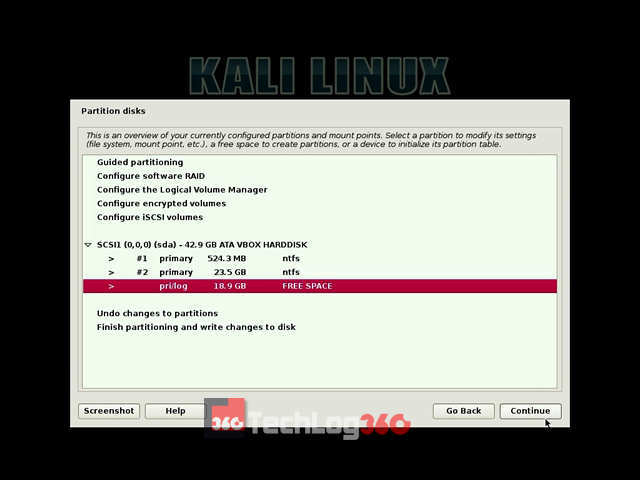
Step 19:
Now, it will ask us how to use those free space. Select the option " Automatically partition the free space " and "Continue" the process.
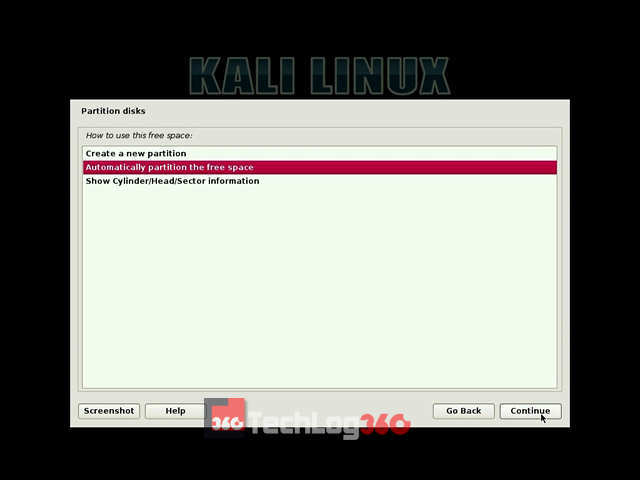
Step 20:
Next, choose the option " All files in one partition " that is recommended for new users and press "Continue".
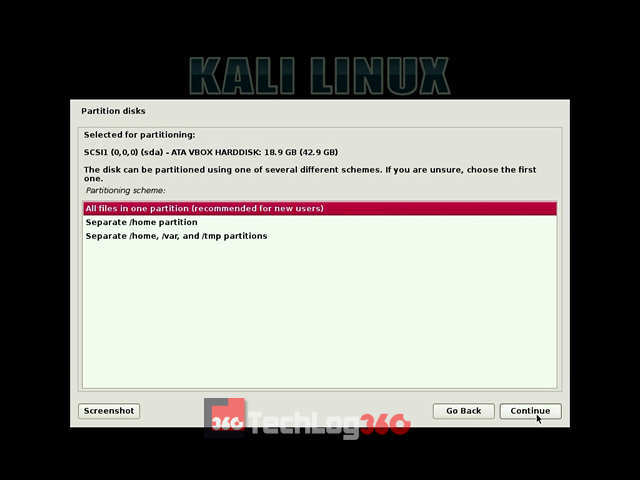
Step 21:
Finally, select the option " Finish partitioning and write changes to disk ".
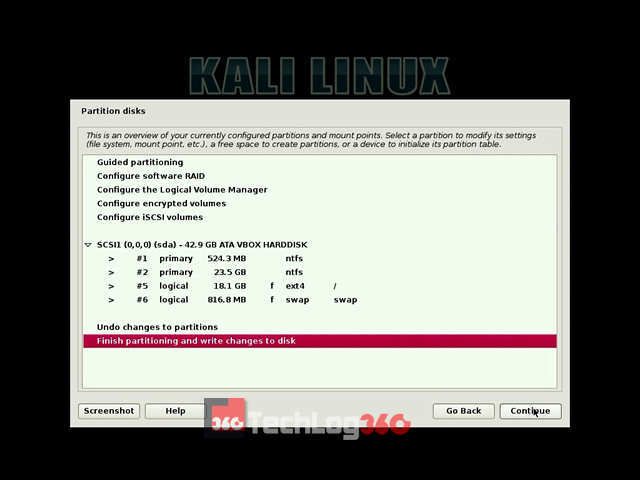
Step 22:
Here, it will ask permission to write changes in the disk. Choose " Yes " and "Continue".
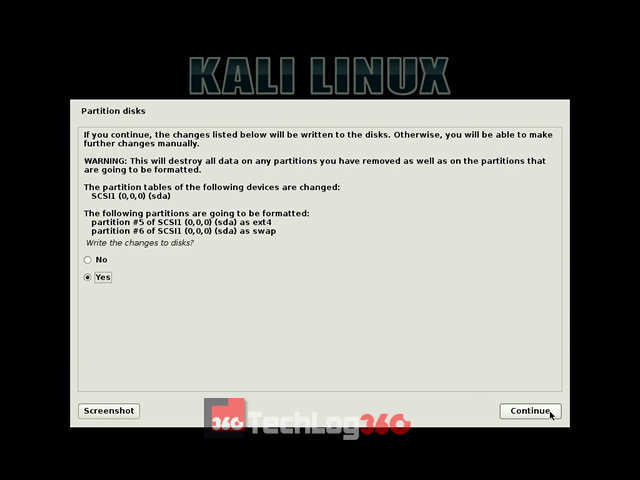
Now the Kali will start the installation process. Wait 10-15 minutes to complete the installation.
Step 23:
In the middle of the installation, it will ask for the network mirror, choose "Yes" or "No". This setting is about an update option. So we recommended you to choose "No" now. You can later enable it.
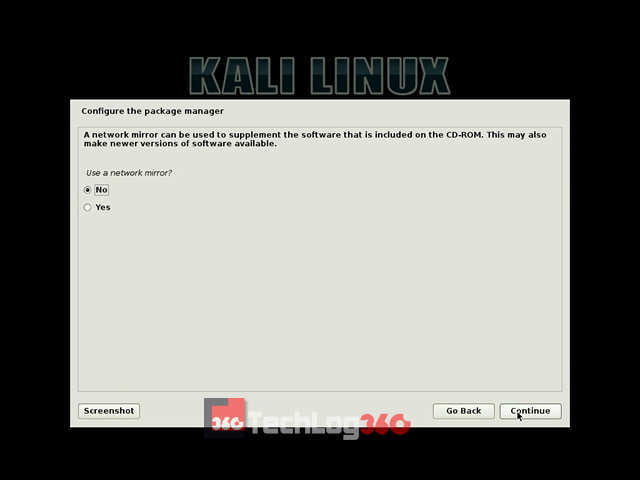
Step 24:
Next, it will ask for installing GRUB boot loader , choose " Yes " and "Continue".
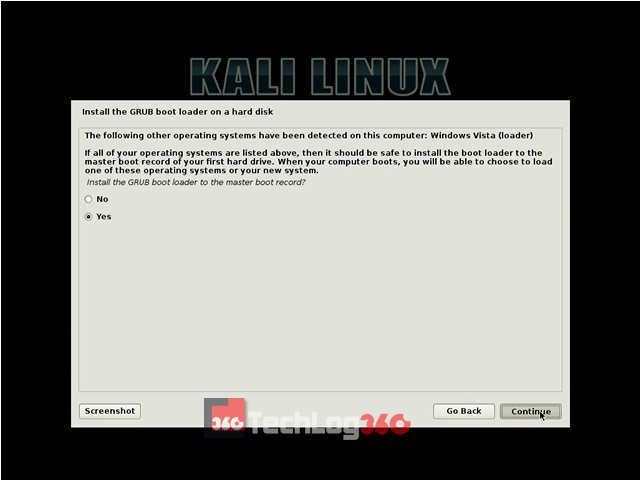
Step 25:
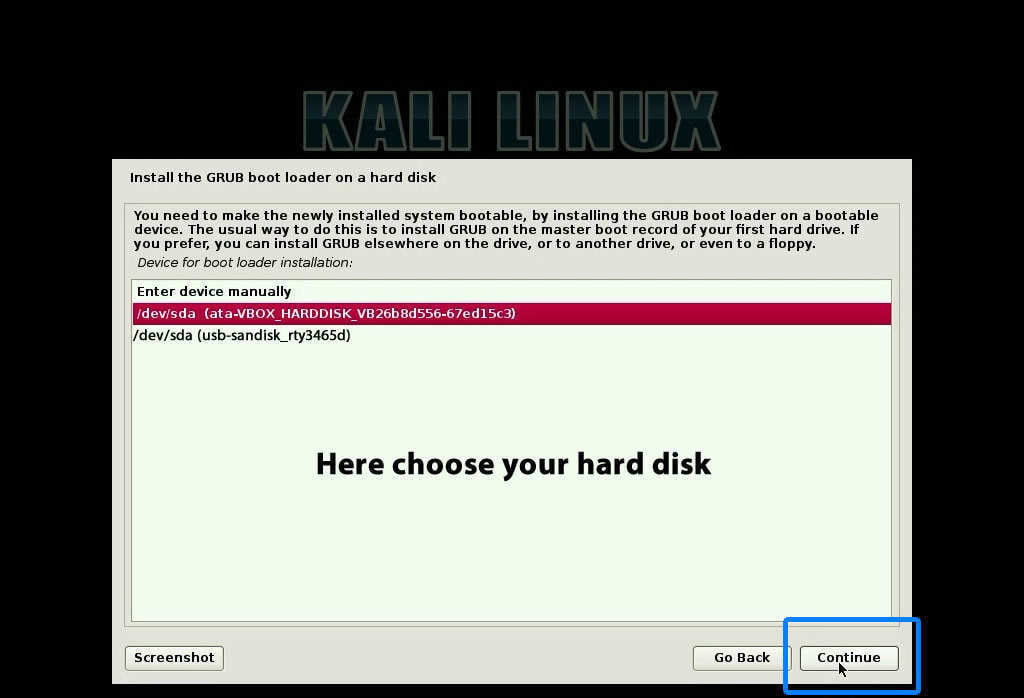
Next, it will ask where to install Kali GRUB boot loader. Choose your hard disk, second option. Remember only choose your hard disk to install GRUB. Otherwise, after the installation of Kali Linux, your system will not display the option to choose the operating systems on startup.
Step 26:
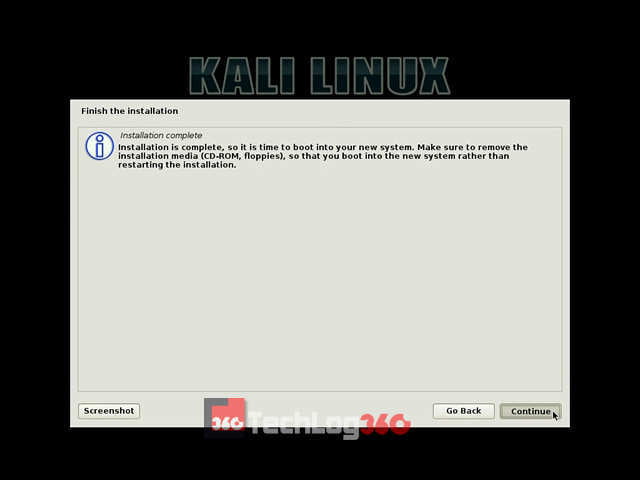
After the successful completion of the installation process, now you can see a screen similar to the below screenshot. Choose "Continue".
Step 27:
Now eject USB drive and restart your system.
During startup you can see the GRUB Loader of Kali Linux. Here you can choose " Kali GNU/Linux " to boot your PC/Laptop with the new Kali Linux or else choose " Windows Recovery Environment " to boot into Windows 10.
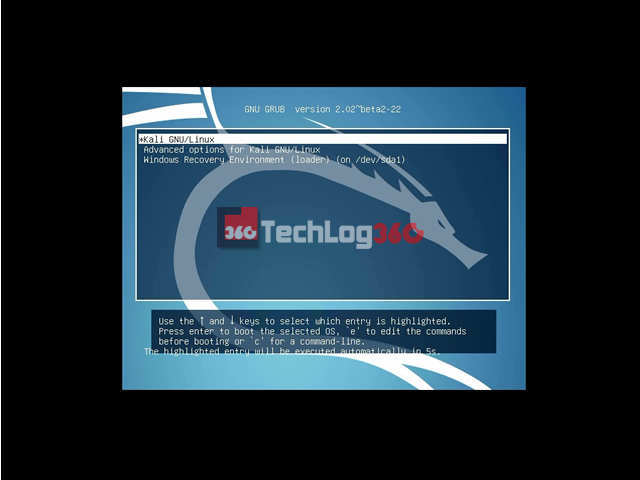
Cool, here is your new hacking and penetration testing partner. Start to break stuff like a pro. Also, check out our full A-Z list of Kali Linux commands.
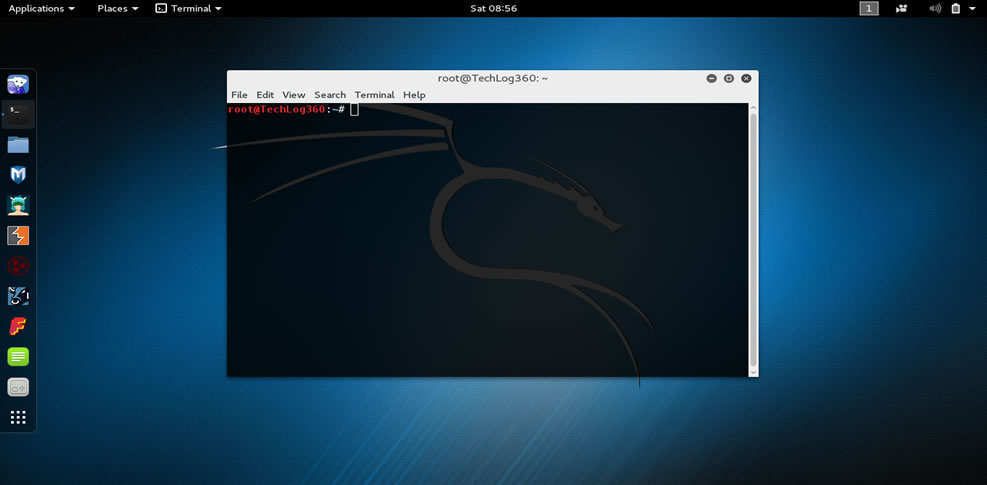
We hope you like the article regarding how to install Kali Linux v2021.1 with Windows 10. If you have any doubts or facing any problem during installation please contact us or comment below. We are here to help you.
And wait for some new Kali Linux tutorials 🙂
Also Read: How To Uninstall Linux Or Windows From Dual Boot System
Check out Video Tutorial ► Dual boot Kali Linux With Windows
[Solution] – Authentication Problem During Kali Linux Startup
Sometimes, even after the successful installation of Kali Linux, many users fail to login to Kali first time. The problem they are facing is authentication.
You may also experience the same problem, even after entering the correct Username & Password (one that provided during installation), you fail to login to Kali Linux. Don't worry we have a solution for you.
When Kali Linux asks you to enter Username for the first time, do not enter the Username you given during installation. Instead, just type "root" in username field and then enter the password as " toor ". If that password didn't works enter the one that you set during installation. Yes, this will solve your problem.
[Solution] – Missing GRUB in Kali Linux
Some of our readers are reporting a problem, that after installing Kali Linux they are unable to boot into Windows. This is because of missing GRUB loader. So to solve this problem you have to reinstall the GRUB menu so that it can detect Windows. To do so boot into Kali and open terminal and type following commands :
os-prober update-grub
Solution Source: Kali Forums
[Solution] – After Installing Kali, PC Directly Boots to Windows
Many readers are reporting that even though after successfully installing Kali, every time PC boots automatically to Windows without showing GRUB. This is due to failed GRUB installation happens because of Bootable flag option is off. GRUB installs successfully only when this option is on. See step 17, you can find the bootable flag option is turned on there during installation.
So this is one of the possible solutions for that problem :
- First boot with your Kali USB
- Select the "Live" option to boot into Kali Live mode.
- Open Terminal window.
# fdisk -l (First we have to find out the partition Kali is installed on (: /dev/sda1, /dev/sda2, etc) ) # mount /dev/sda1 /mnt (Mount your kali partition) # mount --bind /dev /mnt/dev (You will need to mount the /dev directory into mnt) # chroot /mnt (change the root to the mounted partition to be able to run the command from the mounted partition) # grub-install --recheck /dev/sda (install grub in the HDD sda, not sda1, sda2, etc.., just sda.
- Now reboot the system, you will see your boot-menu showing Window and Kali Linux both simultaneously.
- Now, please issue these 2 commands, if they fail, do not worry, you will have to do it after reboot. This will make Windows show up in the grub menu. # os-prober (looks for partitions in the HDD and register them in the os-prober file. # update-grub (Takes some templates, including the os-prober file and writes them in the menu)
- That is all, once done, reboot. You should see the grub menu. If you do not see the Windows option in the menu, don't worry, just enter Kali, open up a terminal and run the 2 commands I posted above.
- Reboot again, you should see the Kali and Windows option in GRUB menu
If this method didn't work out for you then try the below mentioned on.
[Solution] – Adding Kali Linux to Windows Boot Manager using EasyBCD
As we told before, sometimes because of some reason Kali Linux won't boot after installation and directly opens Windows. And most instance above mentioned method solves this Kali grub not showing on the Windows problem.
If you already tried the above solution and still not solved the problem, then probably this method will help you to add Kali Linux bootloader.
In this method, instead of installing GRUB bootloader we are adding Kali Linux boot entry to our Windows boot manager. To do this task, we are using the free edition of a simple tool called EasyBCD. So download and install EasyBCD Community Edition and do as follow :
Open EasyBCD and go to the "Linux/BSD" tab and choose the option "Add New Entry".
Next, you have to select the type of bootloader for your Linux distribution. Since we are using Kali Linux — choose GRUB2. And next, change the name of the operating system to Kali Linux. And finally set the drive option as "Automatically locate and load" and hit the "Add Entry" button.
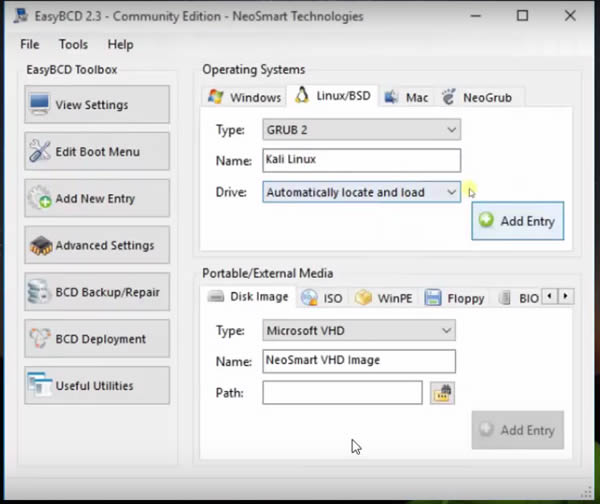
Now you have to set Windows 10 as the default OS so that your system will boot directly to Windows during startup. So go to the "Edit Boot Menu" option and tick Windows 10 or your Windows version and finally hit the "Save settings" button. And finally, restart your PC and boot into Kali.
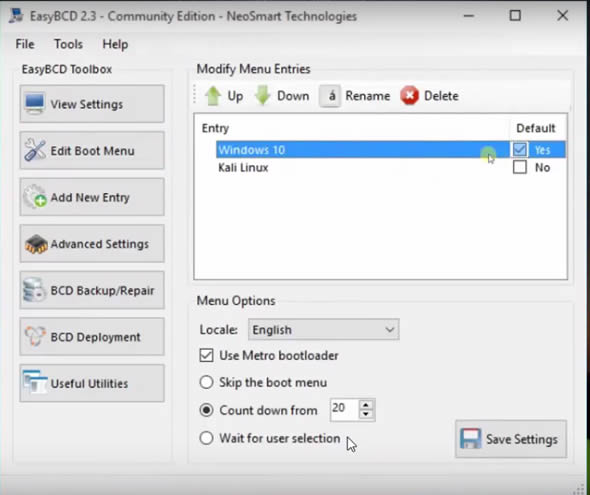
Let us know the above-mentioned step resolved your issue. If not try this solution.
If you think Kali Linux is not that secure as you thought, then try any of these security and privacy-focused operating systems and also if you are a Linux beginner and feel Kali kinda heavy and difficult to maneuver then you should try with these selected Linux distributions for beginners.
If you have any doubts or facing any problem during installation please free to comment below!
How to Delete Windows and Install Kali Linux
Source: https://techlog360.com/how-to-dual-boot-kali-linux-v2-0-with-windows-10/